Description
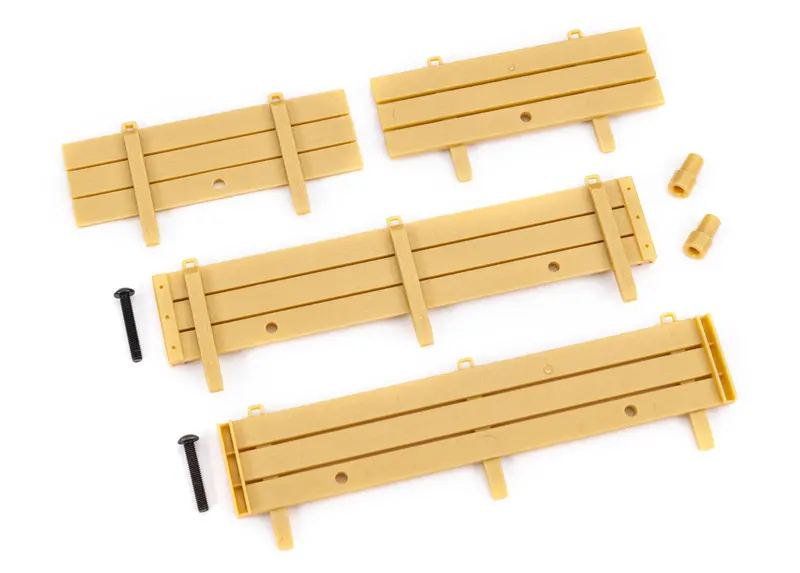
Stake side panels are a great way to increase the hauling capacity of your TRX-4M™ Utility Trailer with a fun and authentic look. Stake sides are molded with realistic textured wood grain and holes to attach spare trailer wheels (sold separately). How to Add Scale Realism to TRX-4M Utility Trailer Stake Sides
|
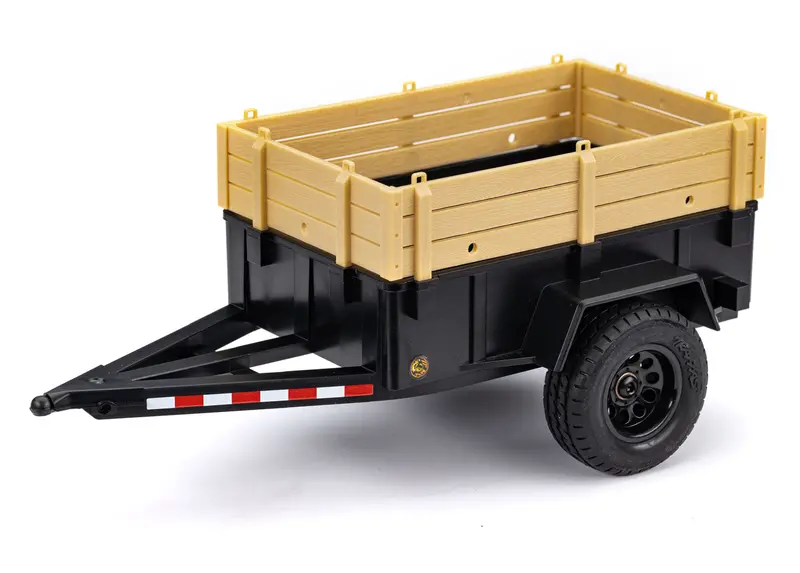
The Traxxas Utility Trailer is a great way to practice your driving skills or to enhance the TRX-4M’s realistic scale appearance. The functional trailer looks great right out of the box and carries plenty of scale gear. Just like a full-size trailer, the available stake side panels increase the hauling capacity with a fun and realistic look.
The stake sides are molded with textured wood grain for an authentic look. For even more detail, you can paint the stake sides to look stained and weathered, just like real wood. The process uses paints and other materials available from your local hobby store. Read on to find out how. Here’s What You’ll Need: 9798 Utility Trailer Stake Sides
Preparing the Surface for Painting Step 1. Paint needs a clean surface to bond properly. Wash the stake sides with dish soap and rinse them thoroughly before allowing them to dry. Use nitrile gloves if you have them or try to avoid handling the parts as much as possible. Oil from your fingers could cause paint to adhere poorly and flake off.
Step 2. Spray the parts with one or two very light coats of primer. You want to cover the parts completely, but don’t use so much that you cover up the wood grain texture. Step 3. Apply a thin base coat of paint on top of the primer. Acrylic paints are too thick for this purpose, so thin them slightly with acrylic paint thinner. We chose a shade of beige for the base coat and applied it lightly with a paint brush. Cover the stake sides completely using a very light coat.
Applying the Paint Step 4. Once the base coat has dried completely, it’s time to apply the weathering color. We chose a shade of acrylic paint called Burnt Umber. The paint is too thick to apply out of the bottle so a light paint wash was used. To create the wash, add about 10 ml of water to a small cup and then mix it with a few drops of paint and a few drops of thinner. The solution will be very watery, but the key is to apply multiple thin layers to build up the desired color. Step 5. Apply light coats of the brown wash to the stake sides. The thin solution should easily work its way into the cracks. Once one side is dry, flip it over and paint the other side. Don’t forget to paint the tops and edges too. Step 6. Allow the first coat of wash to dry completely before applying a second coat. Use light brush strokes and do not scrub the surface with the brush or the previous layers could be removed.
Step 7. Allow the second coat to dry completely. Notice how some areas are darker than others. This is what simulates real staining and weathering on wood. Apply a light coat of ProGraphix matte finishing spray to the entire surface. This keeps subsequent layers from erasing the previous ones. Once the matte layer dries, add more layers of wash. The trick is to darken the areas that are already dark. Step 8. Apply as many layers as it takes to get the desired effect, but use a fresh coat of matte finishing spray after every two layers to protect the previous coats. Be sure to let everything dry first.
Step 9. The next step is similar to the last, except this stage uses an acrylic black paint for the wash. The darker black paint will help define the detail and bring out the woodgrain effect. The black wash should be even more diluted than the brown. Apply one light coat to everything and let it dry. Repeat the process as many times as necessary to get perfect coloring. Step 10. For the final step, add a little more black wash to places that were already dark. This will better simulate weathering of real wood. Use the black wash to simulate knots or other imperfections in the wood.
Step 11. Once the color and detail look realistic, allow everything to dry completely and spray another light coat of matte finishing spray to seal the paint. Apply heavier coats of black paint solution to simulate the metal rails on the ends of the stakes. When everything is done, seal it with a final coat of matte finishing spray and admire the finished product.
These weathered stake sides look great and add amazing detail to the utility trailer. If you enjoyed this article, check out some of the other ways you can add custom touches to your vehicle. You can add unique wheel details or customize your accessories. Let your imagination run wild and be sure to post pictures of your creations on our Facebook page. Shop for the Utility Trailer and all Traxxas TRX-4M accessories in the link below.
|


Explore more from our collection.

Reviews
There are no reviews yet.